
As we move into the fall season it’s nice to have a quick, handy snack whether you’re enjoying the outdoors or relaxing inside. Here is a favorite of Jill’s that she would like to share.

- Prep Time: 5 minutes
- Cook Time:15 Minutes
- Total Time: 20 minutes
- Yield: 3 cups
Ingredients:
- 2 tablespoons salted butter
- 3 cups pecan halves
- ½ cup light brown sugar
- ½ teaspoon cinnamon
- 1 teaspoon kosher salt or ¾ teaspoon sea salt
- ¼ cup water
- 1 teaspoon vanilla
Instructions:
Preheat your oven to 350°F. Line a baking sheet with parchment paper and set aside.
In a large skillet, melt the butter over medium heat. Add in the pecans and stir continuously for 3 minutes, until the pecans are lightly roasted.
Add in the brown sugar, and stir for an additional 2 minutes, until the sugar is melted.
Stir in the cinnamon and salt, then add the water.
Cook, while stirring continuously, until the water is evaporated, about 1-2 minutes.
Add in vanilla and stir until combined.
Remove the nuts from the heat and spread them evenly on the baking sheet.
Bake for 5-7 minutes, until the candied pecans are fragrant and lightly crisp.
Remove the nuts from the oven and allow them to cool completely on the baking sheet.
Enjoy this sweet mouthwatering treat!


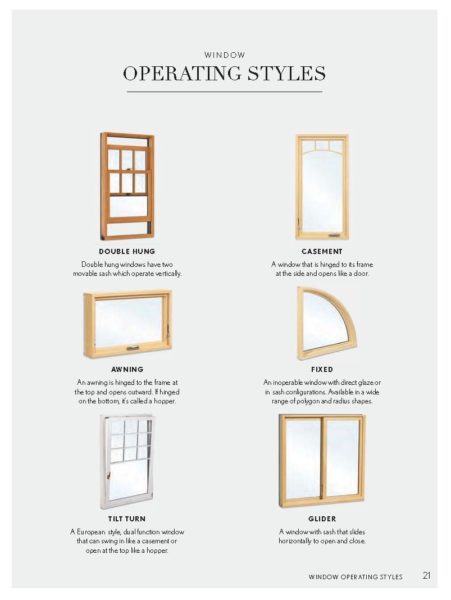


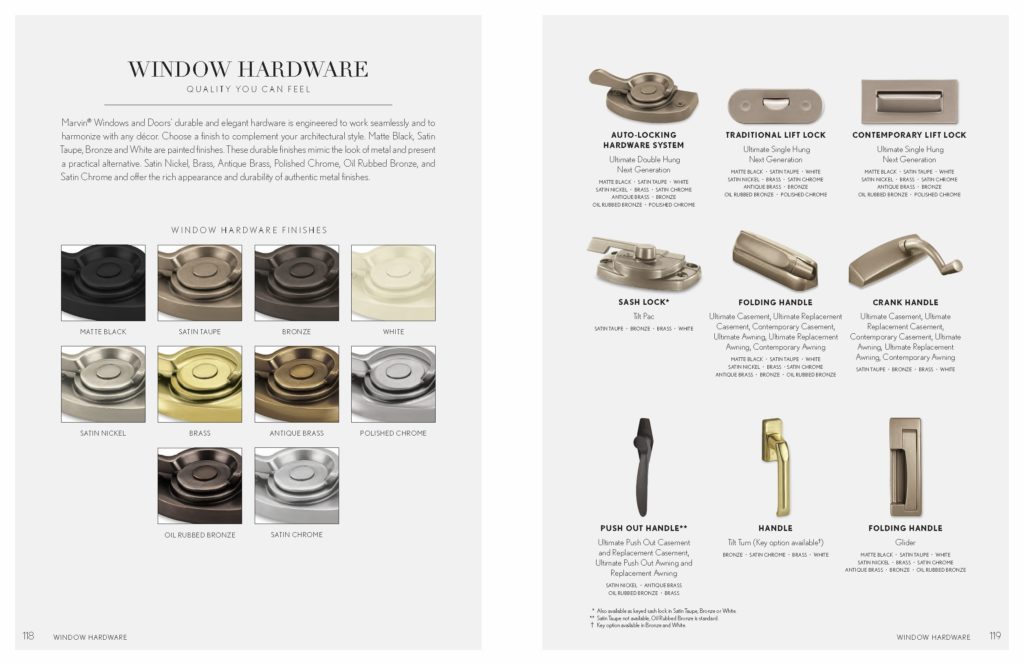
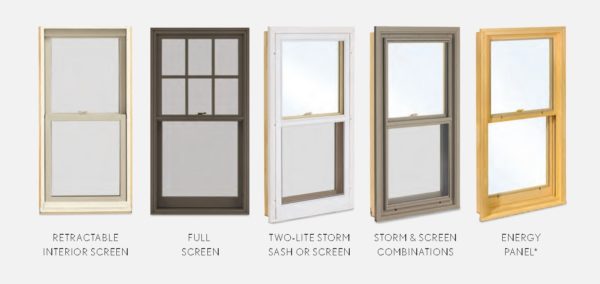
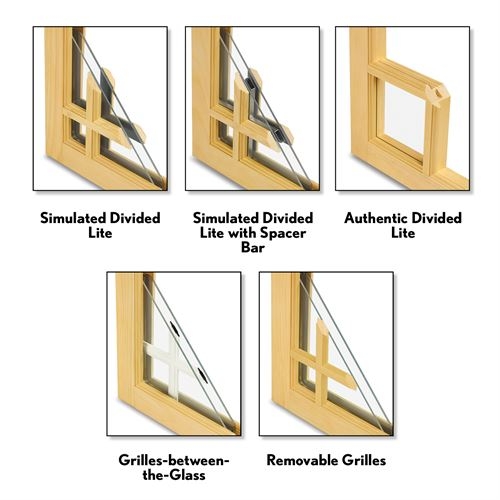 Divided lights refer to the style of grid that appears to “divide” the window pane. Taking your home style & any existing windows into consideration will help to make this choice. Different options offer various aesthetic & practical advantages. Here is a list of some of the most common divided light styles:


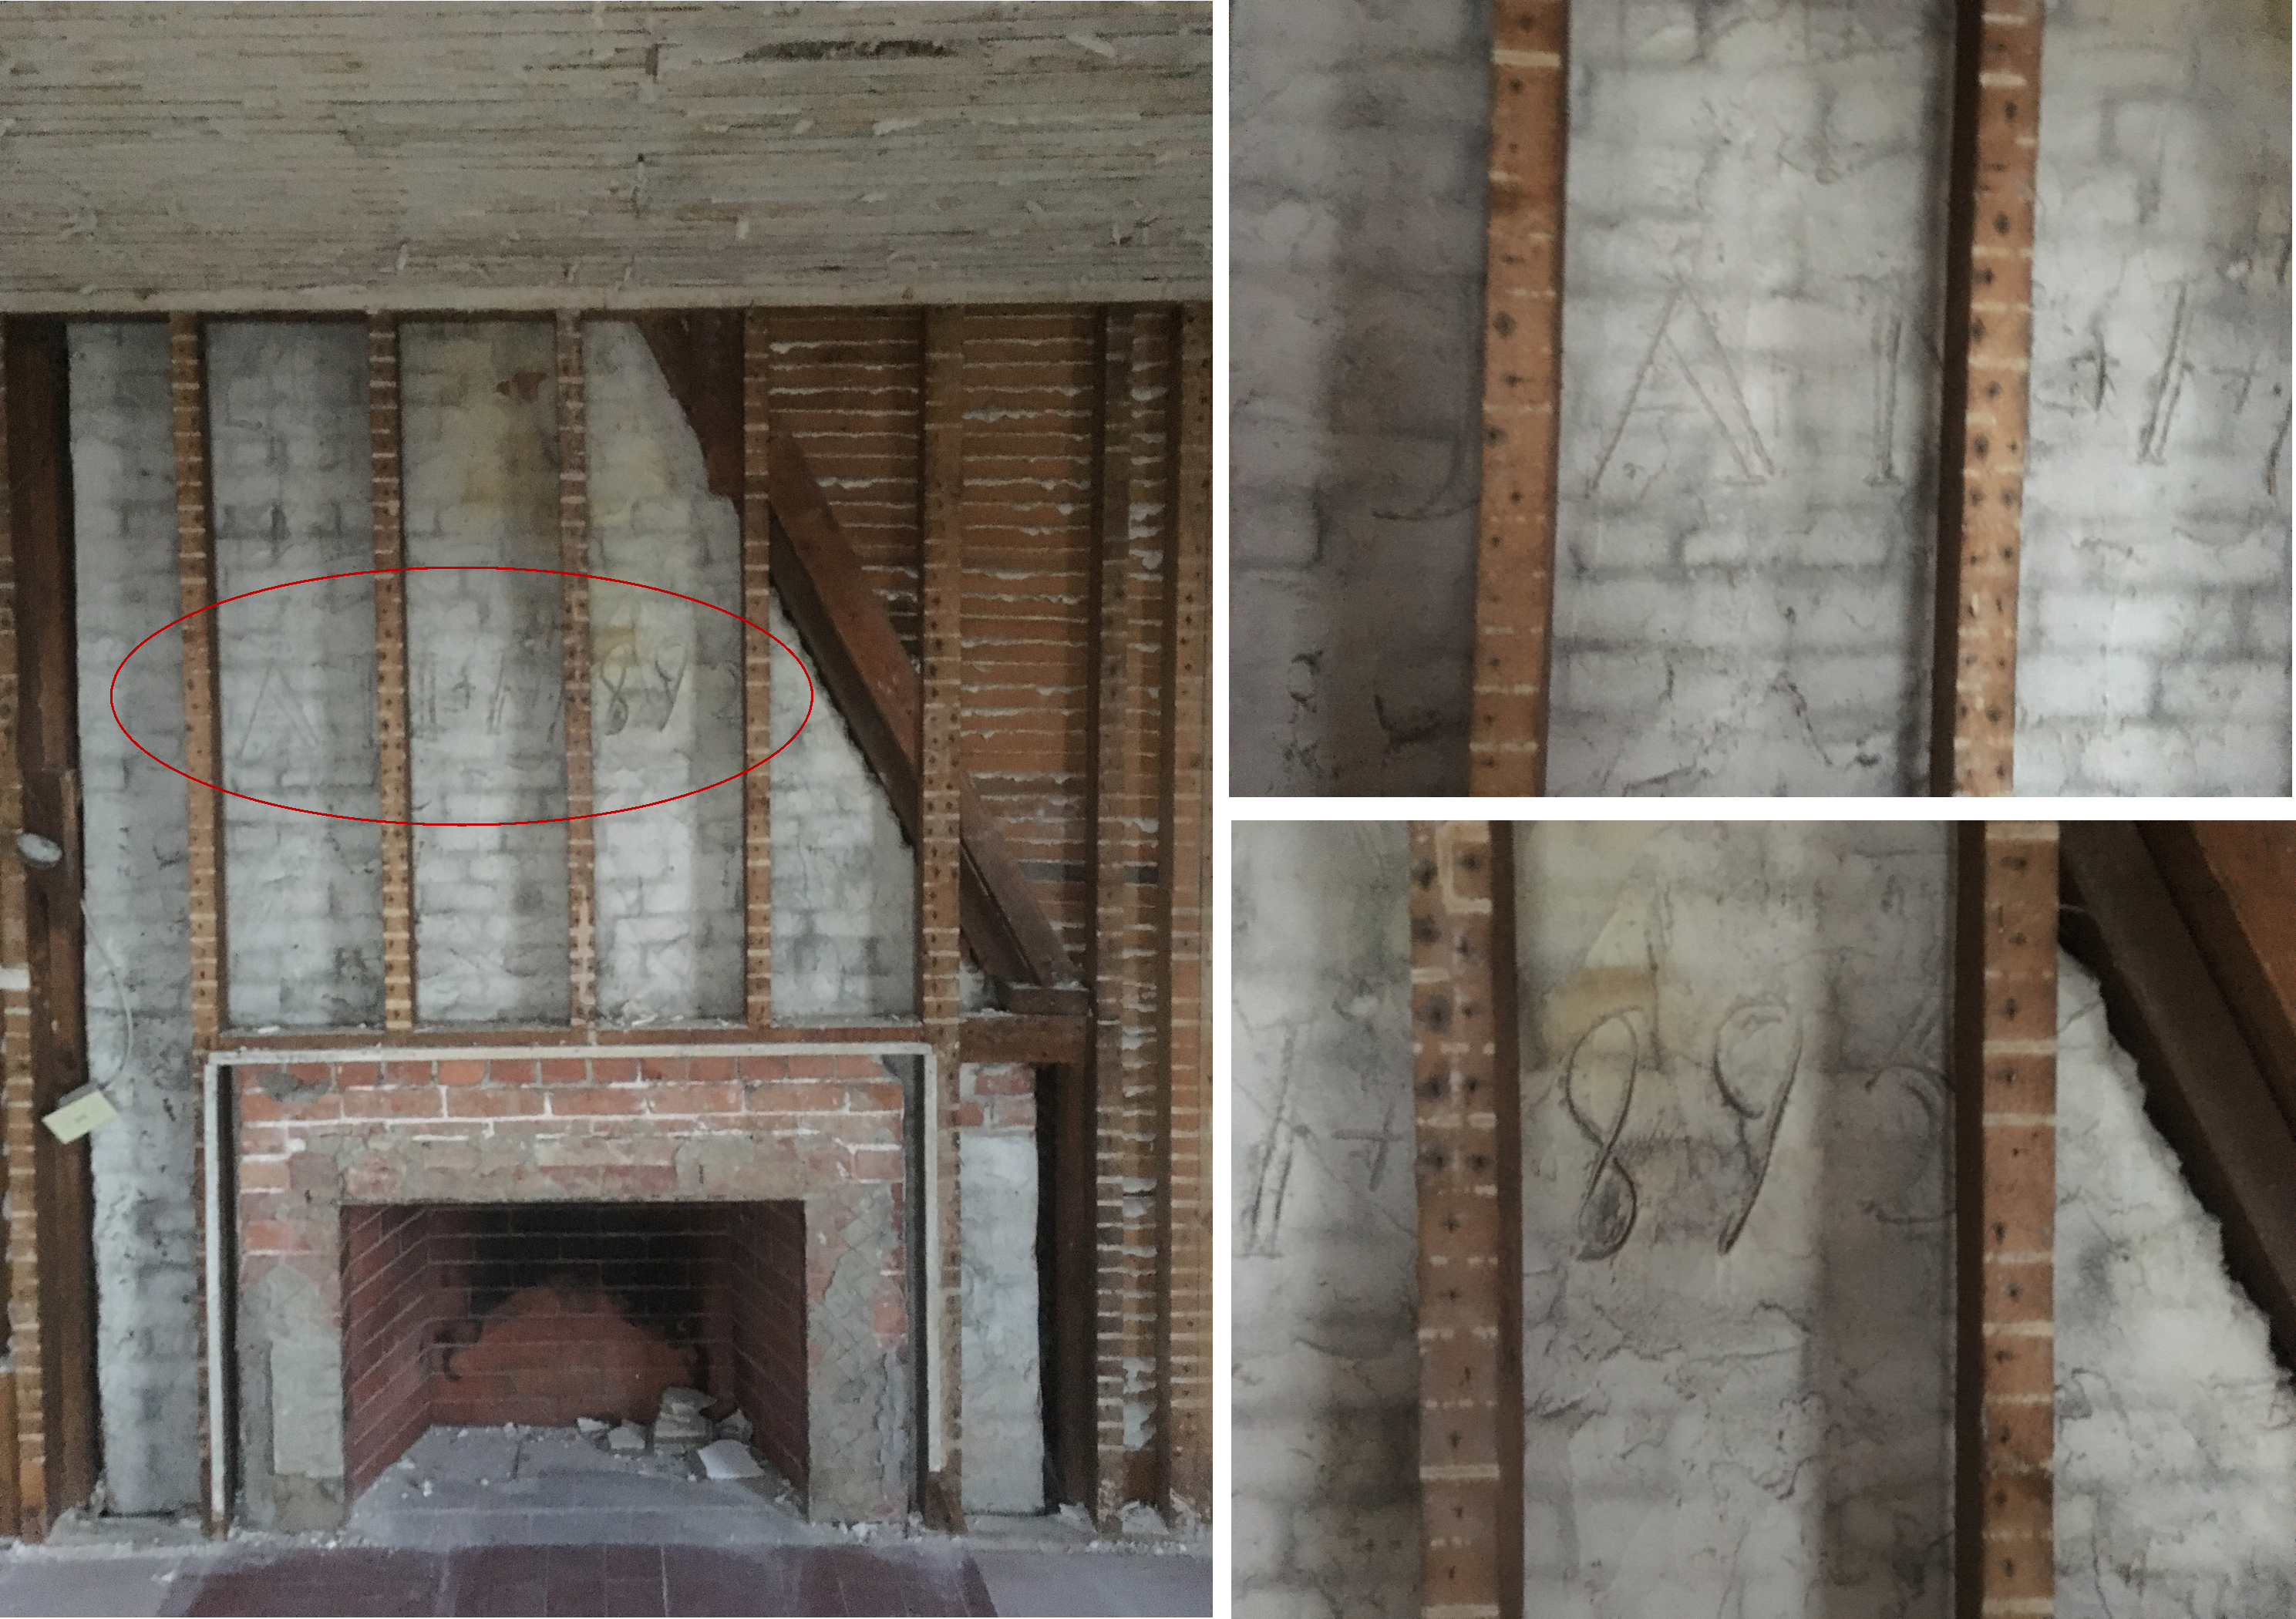


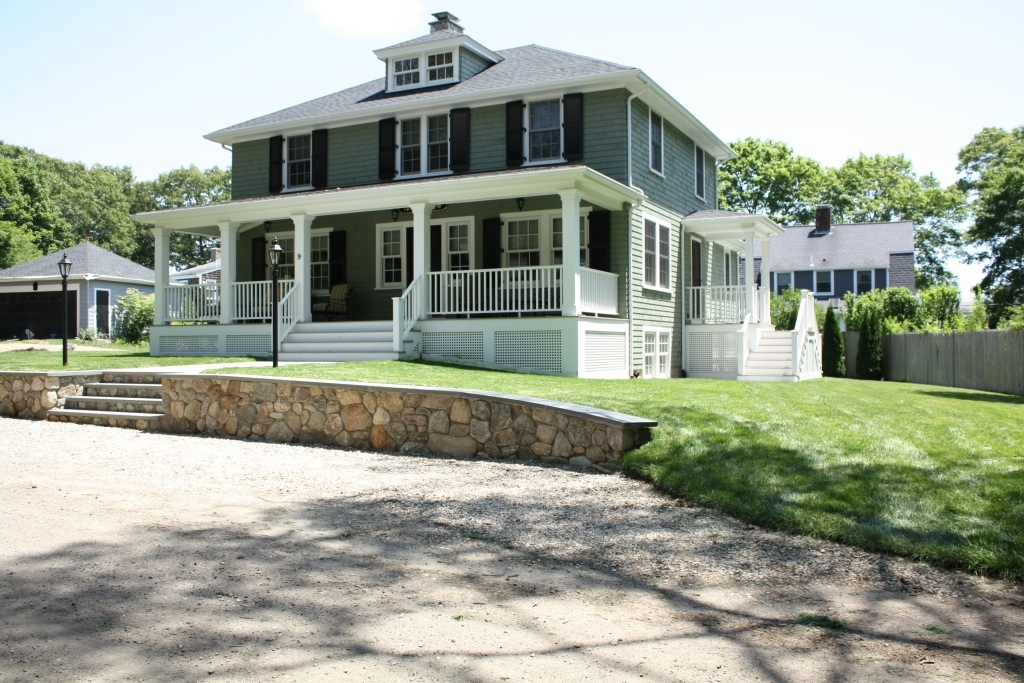
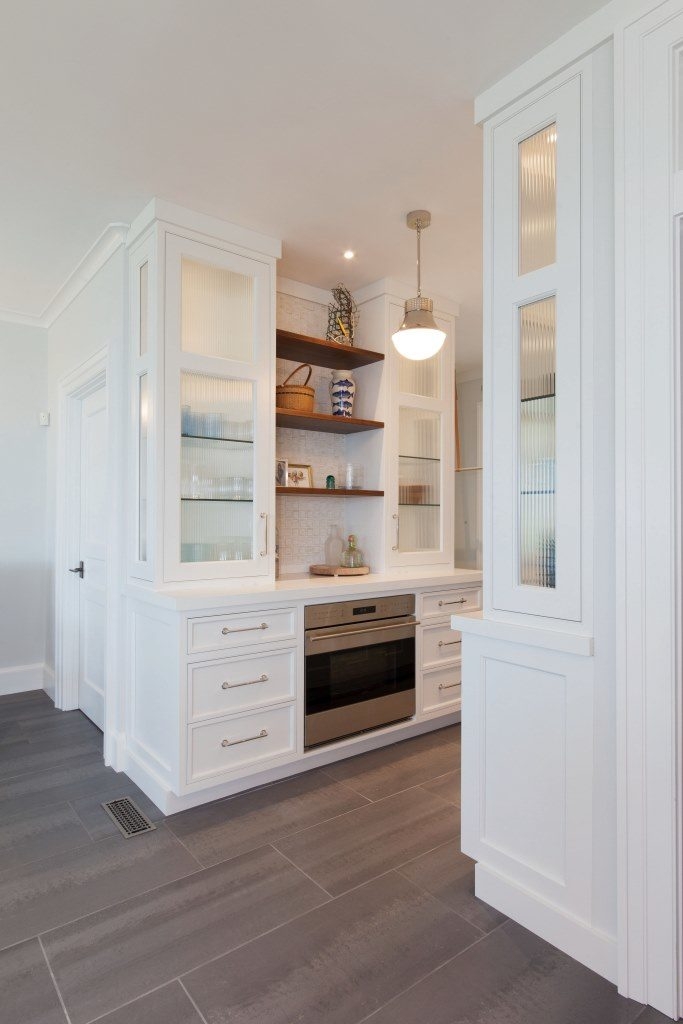
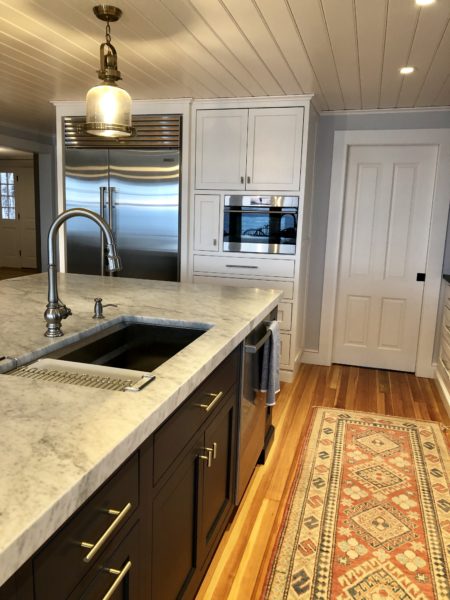
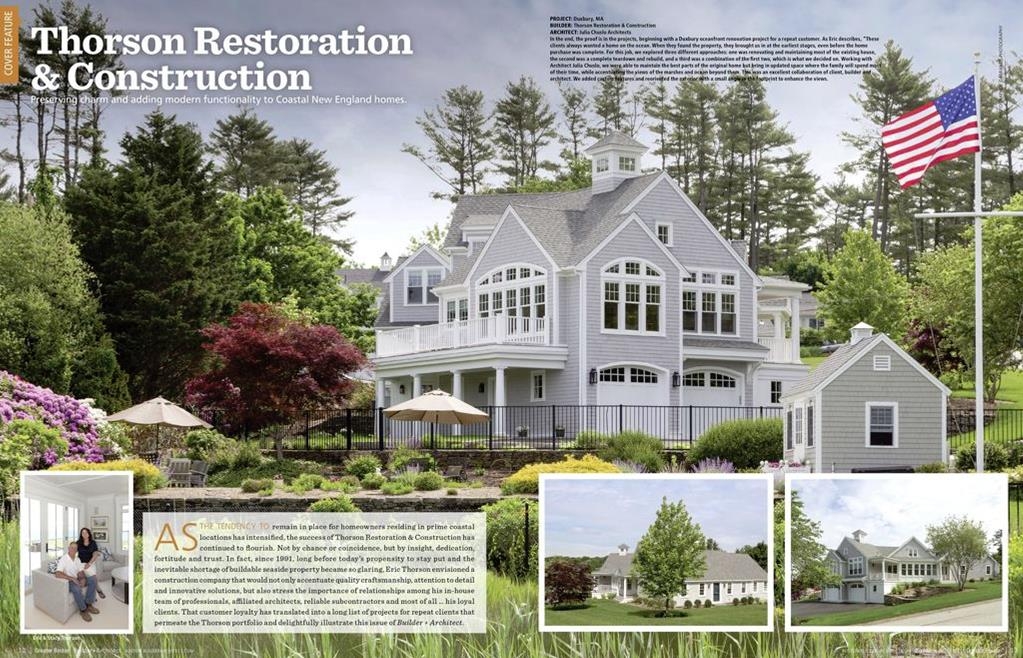
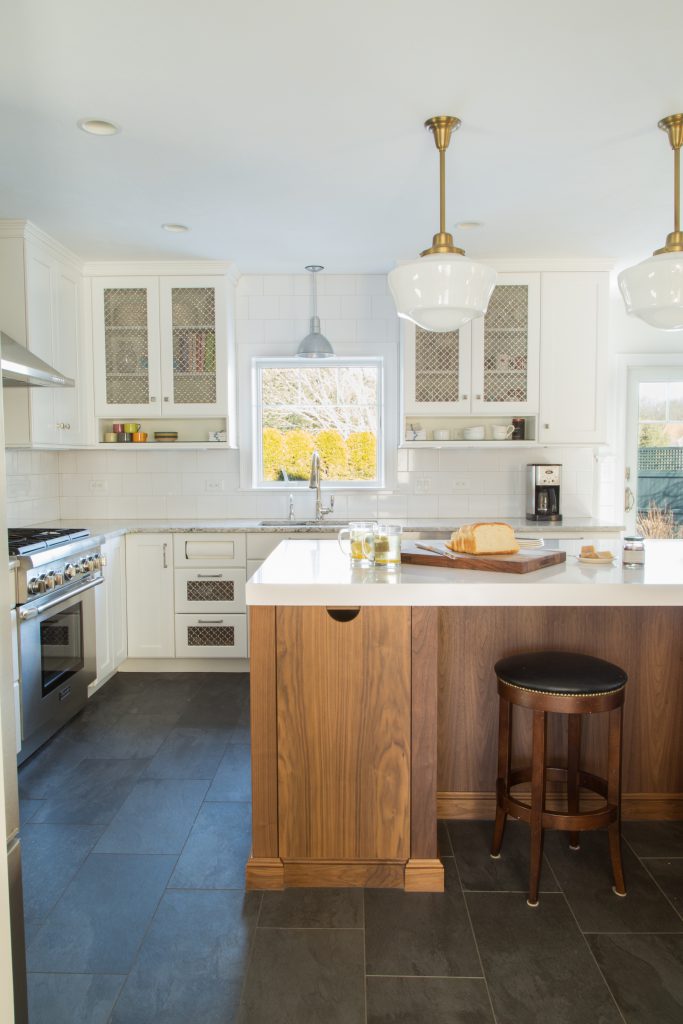
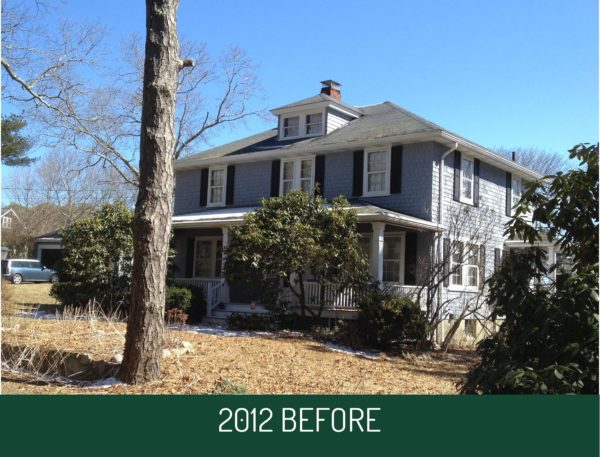 This home, built in 1922 was one that evoked a sense of nostalgia for the client who was raised in this coastal community and since returned to spend countless summers always surrounded by friends and family who occupy several other homes in the area. They personally rented this summer home for years and when it came on the market there was no question that they would purchase it and plan to keep in in the family for generations to come. The home was loaded with charm but needed updating, especially in the kitchen and bathrooms. The family also needed more space in the home overall to be able to comfortably summer here.
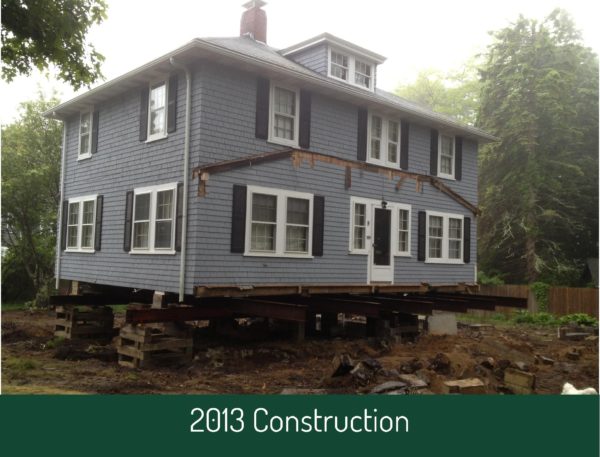 The house was lifted off of it’s foundation, porches removed and a new full height foundation was poured to allow for the finishing of the entire basement area. This portion of the project presented plenty of challenges but the homeowner once again saw value in making this home well suited for them so chose to move forward despite the complexity of the work. The new full height basement significantly increased the square footage of the home and added an additional bathroom, kitchenette and recreational space that the entire family could make use of.
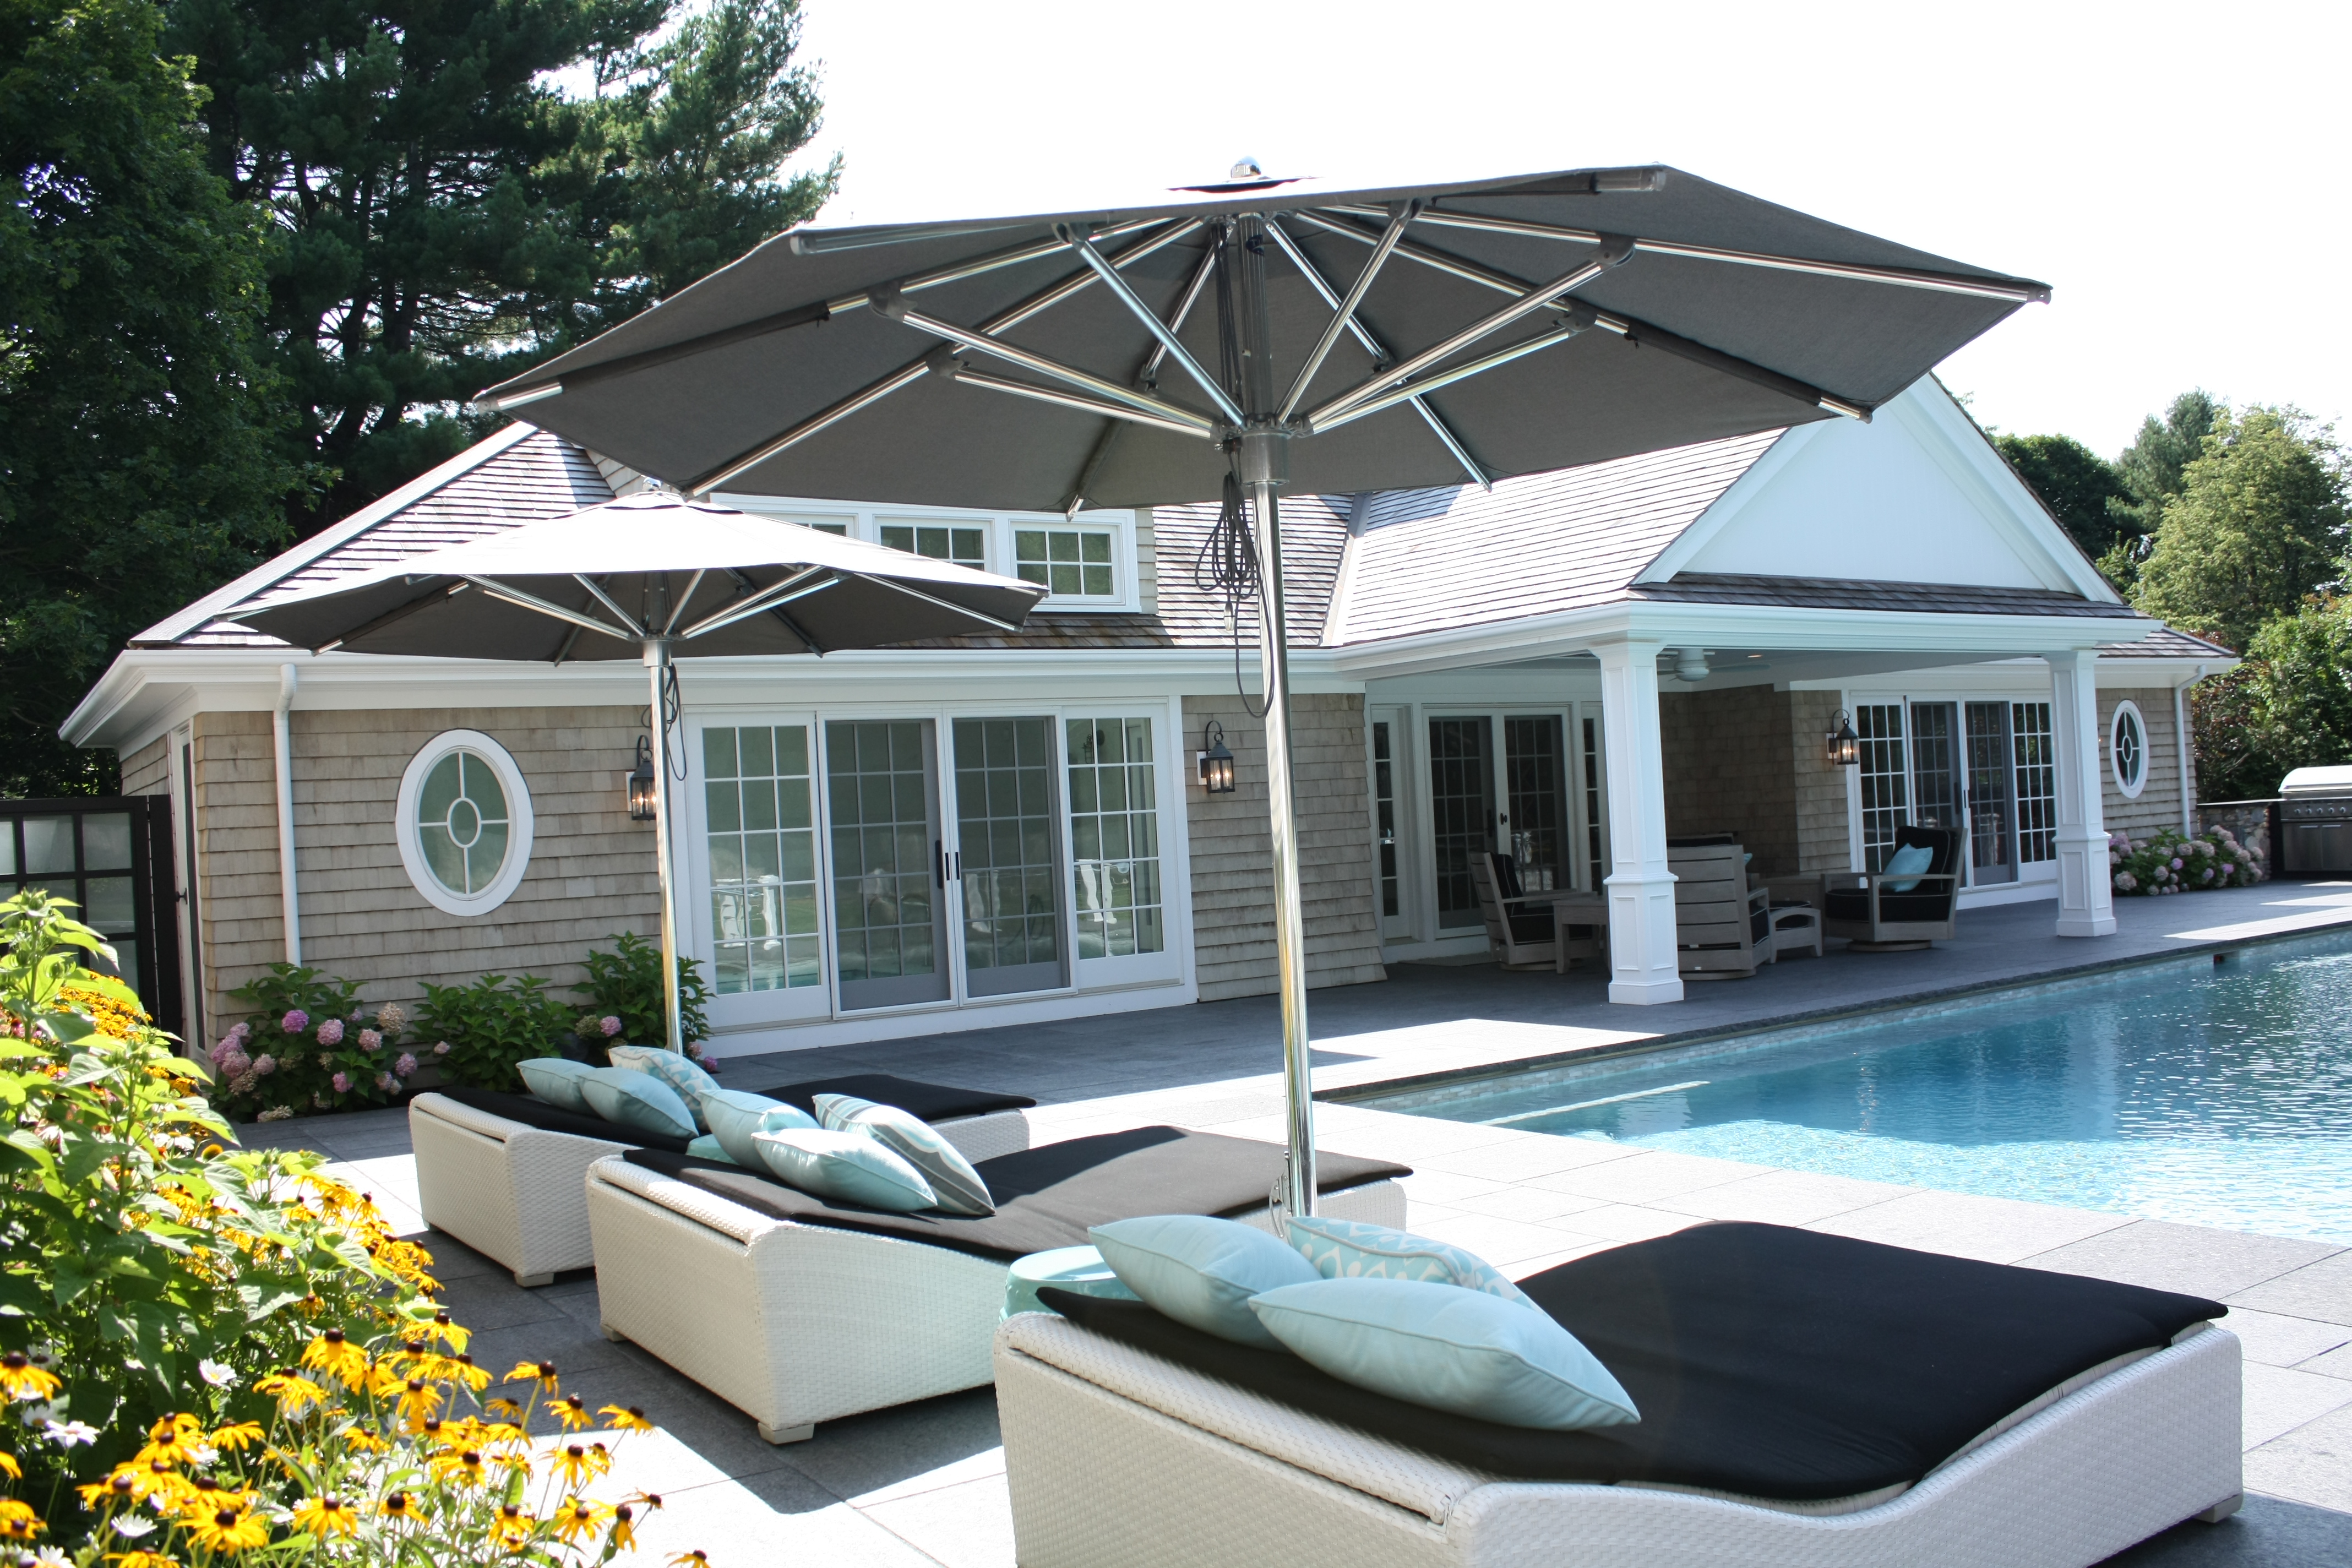
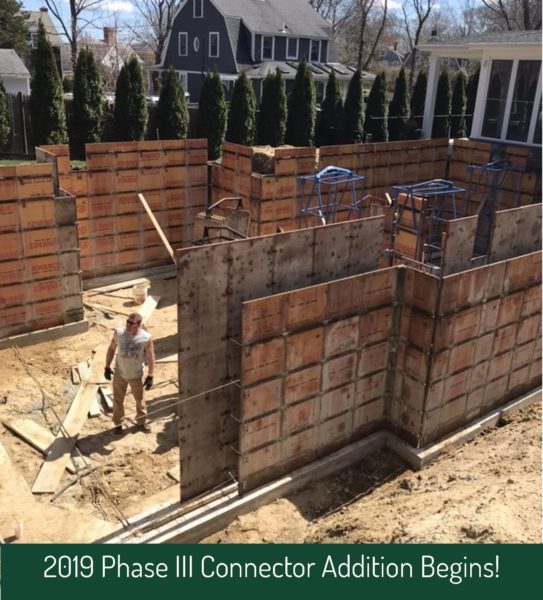
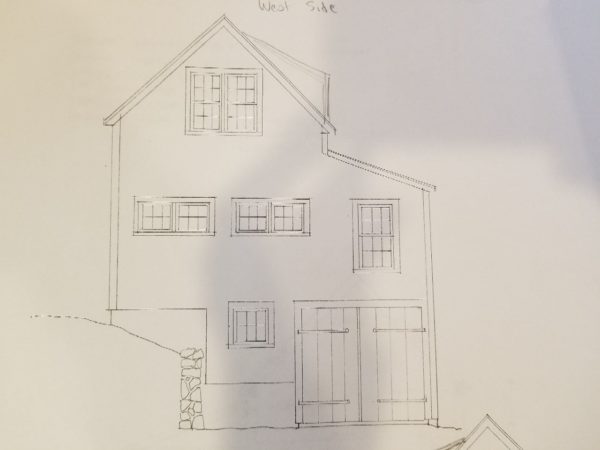
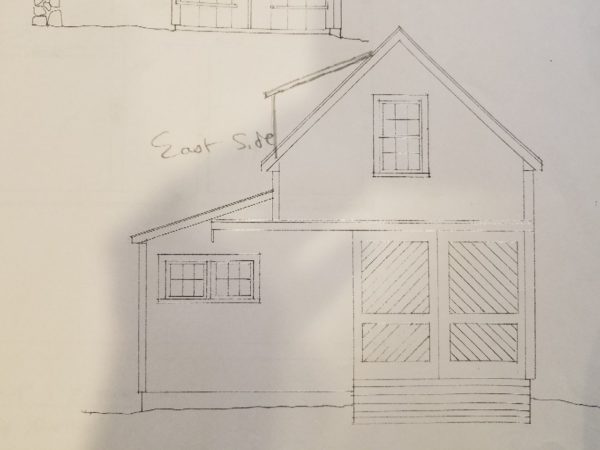
 In 2016 a small underutilized detached garage on the property was demolished and a new 2 car garage with recreational space above was built in it’s place. The garage is perfect additional entertainment area for the countless family visitors that frequented the property throughout the summer months. Aesthetics of the property were significantly enhanced with exterior finishes to match the newly remodeled main home.
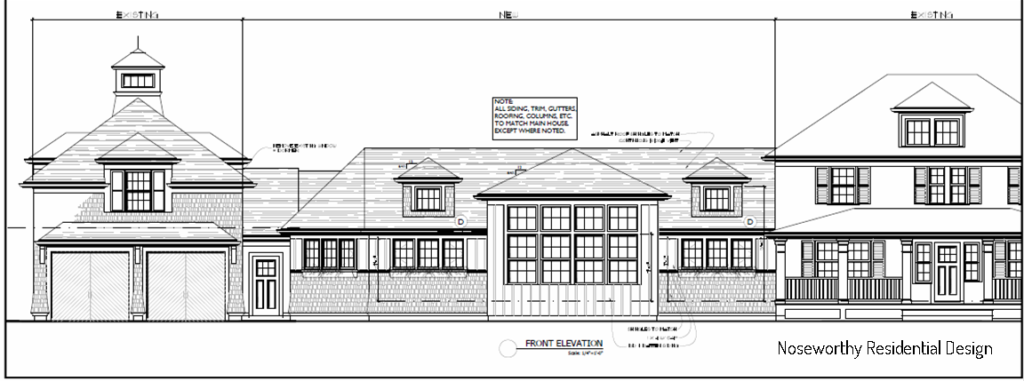

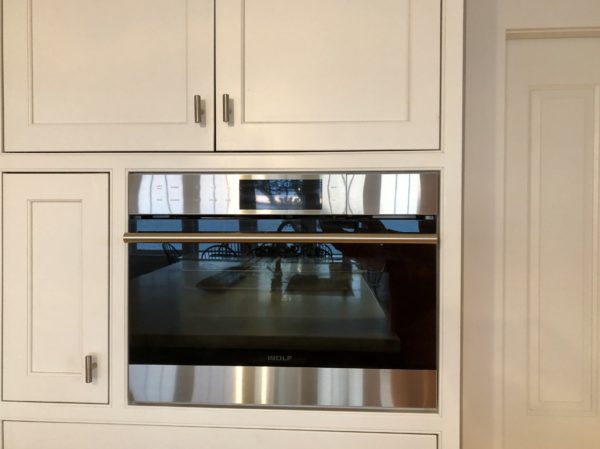
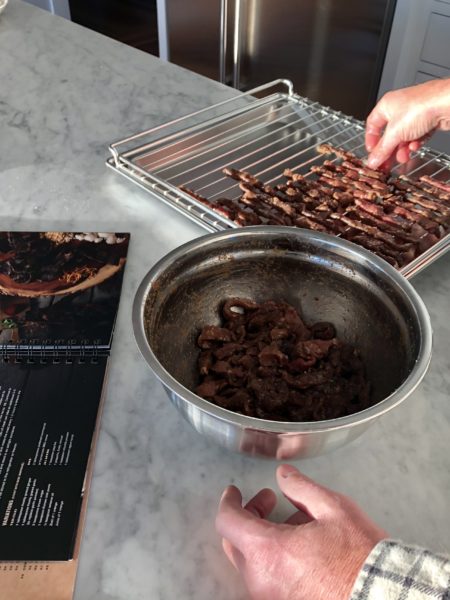 This tasty treat is one that was made by our very own Eric Thorson but comes courtesy of the Wolf’s


 Picture this;
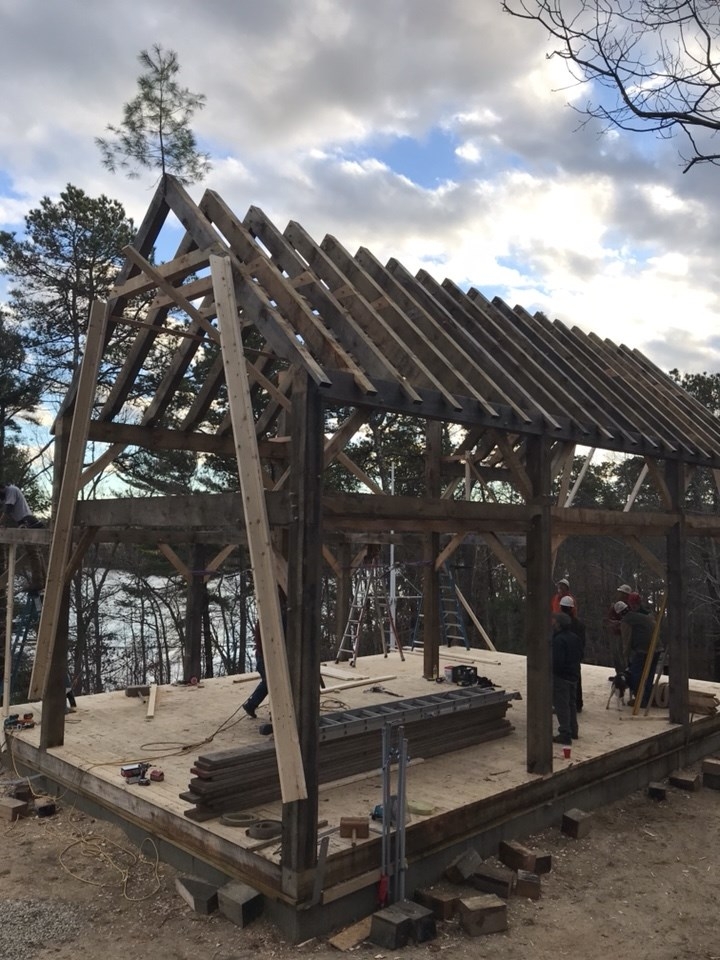
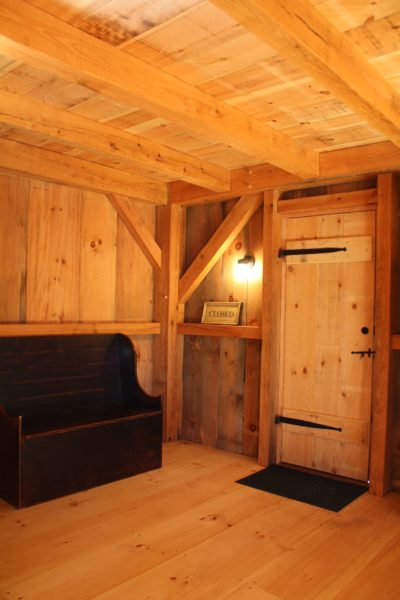
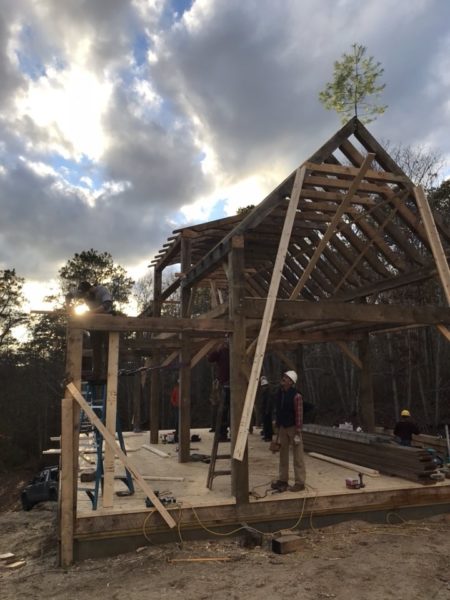
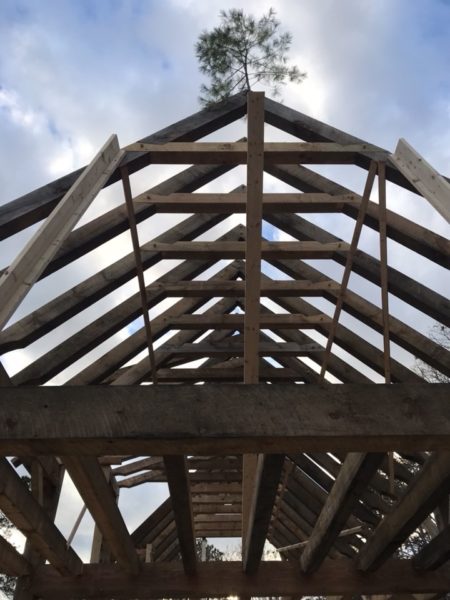
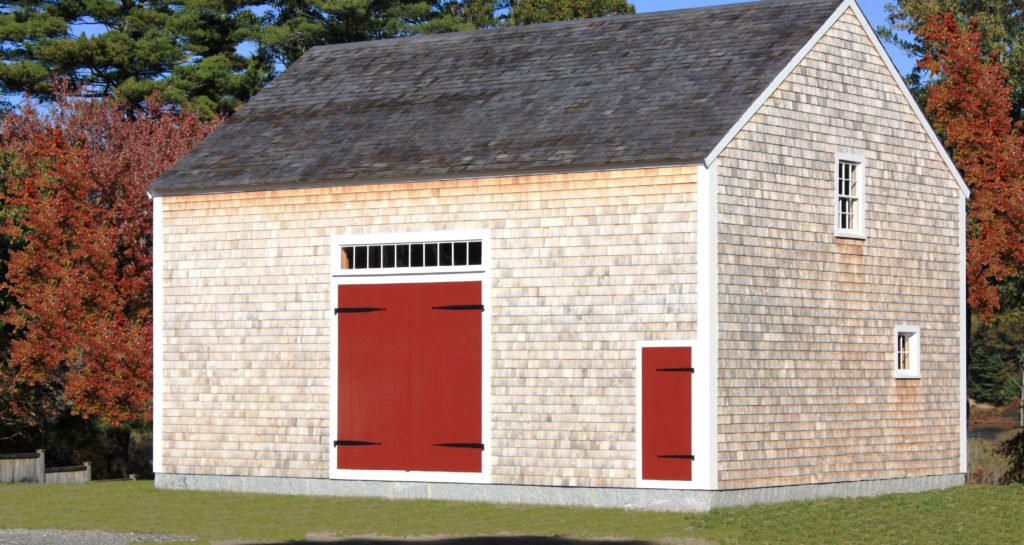 Barns are an intrinsic part of classic New England architecture and although they come in many forms, the majority of the ones that survived the colonial era into today were likely some form of timber frame construction. It’s estimated that timber frame construction has been utilized worldwide since approximately 200 B.C. and there’s no question about why it is still being used today. The method uses large scale beams that are shaped and connected with interlocking joinery & wooden pegs creating an immense amount of strength and durability while still allowing for a measure of flexibility. The result is a structure that can withstand whatever the New England weather patterns can dish out and when properly maintained, can last for generations.
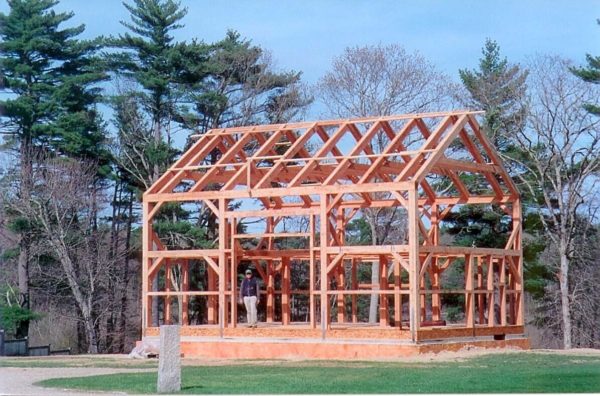
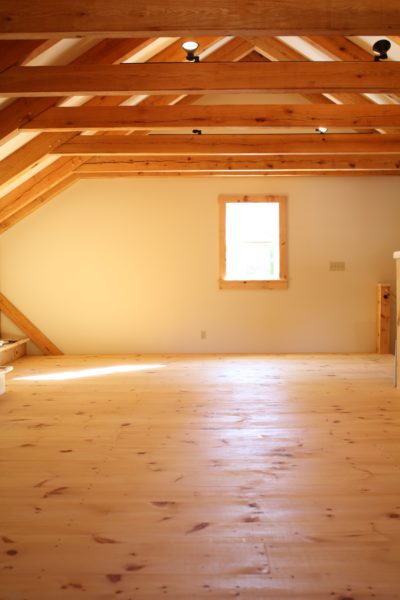
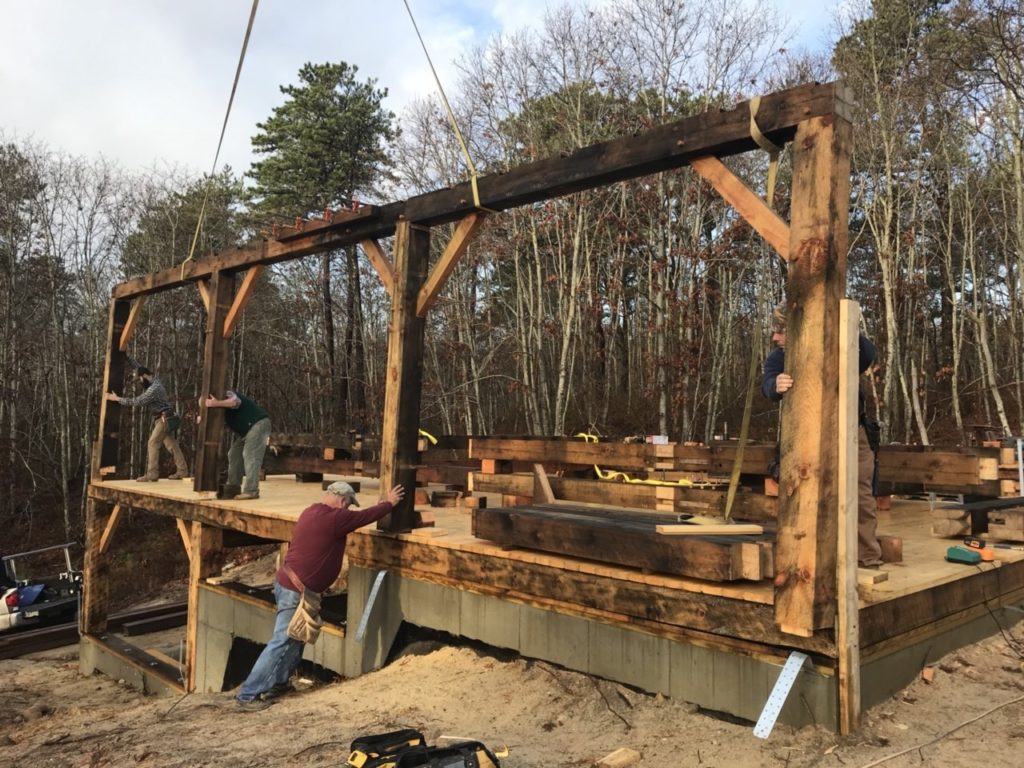


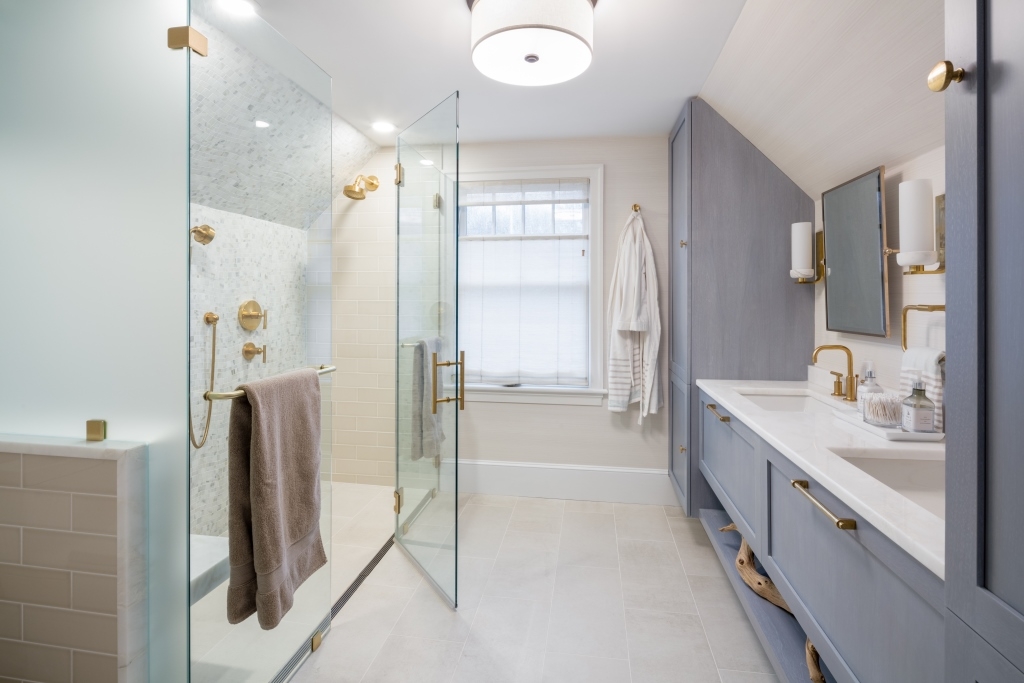
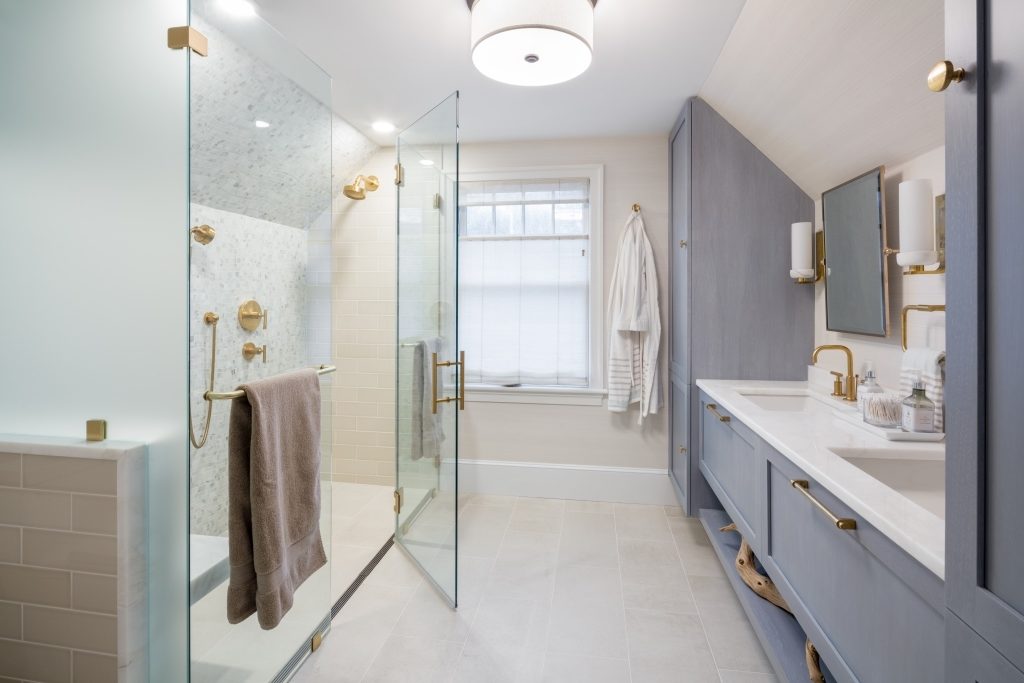
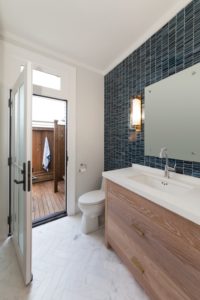 Living in a coastal community as we do here in the Northeast means that many design details in a home are catered to the coastal lifestyle. Whether you are planning for your main residence or a summer home, any home in proximity to a beach is often going to have (or want) an outdoor shower. It’s a matter of practicality really; the comings and goings from the beach can get messy and having a space to rinse off before entering the home means less of that sand and grit make it into your living space. Plus taking a shower out in the open air with a view of the sky & stars is just plain AWESOME. If you’ve never had the opportunity to do it then you’re missing out, but back to the topic at hand. When planning for an outdoor shower why not take it a step further and amp up that functionality ten-fold with an indoor/outdoor bathroom.

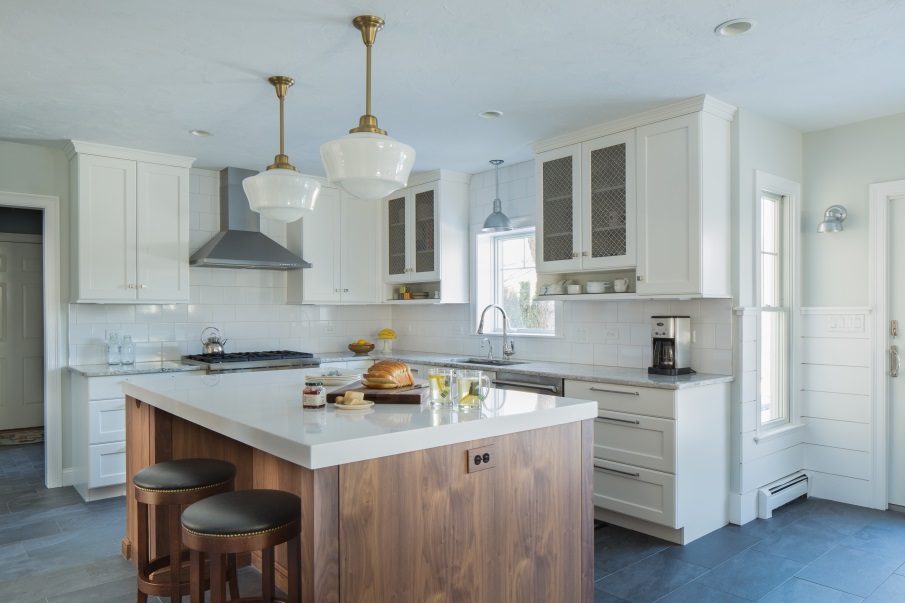
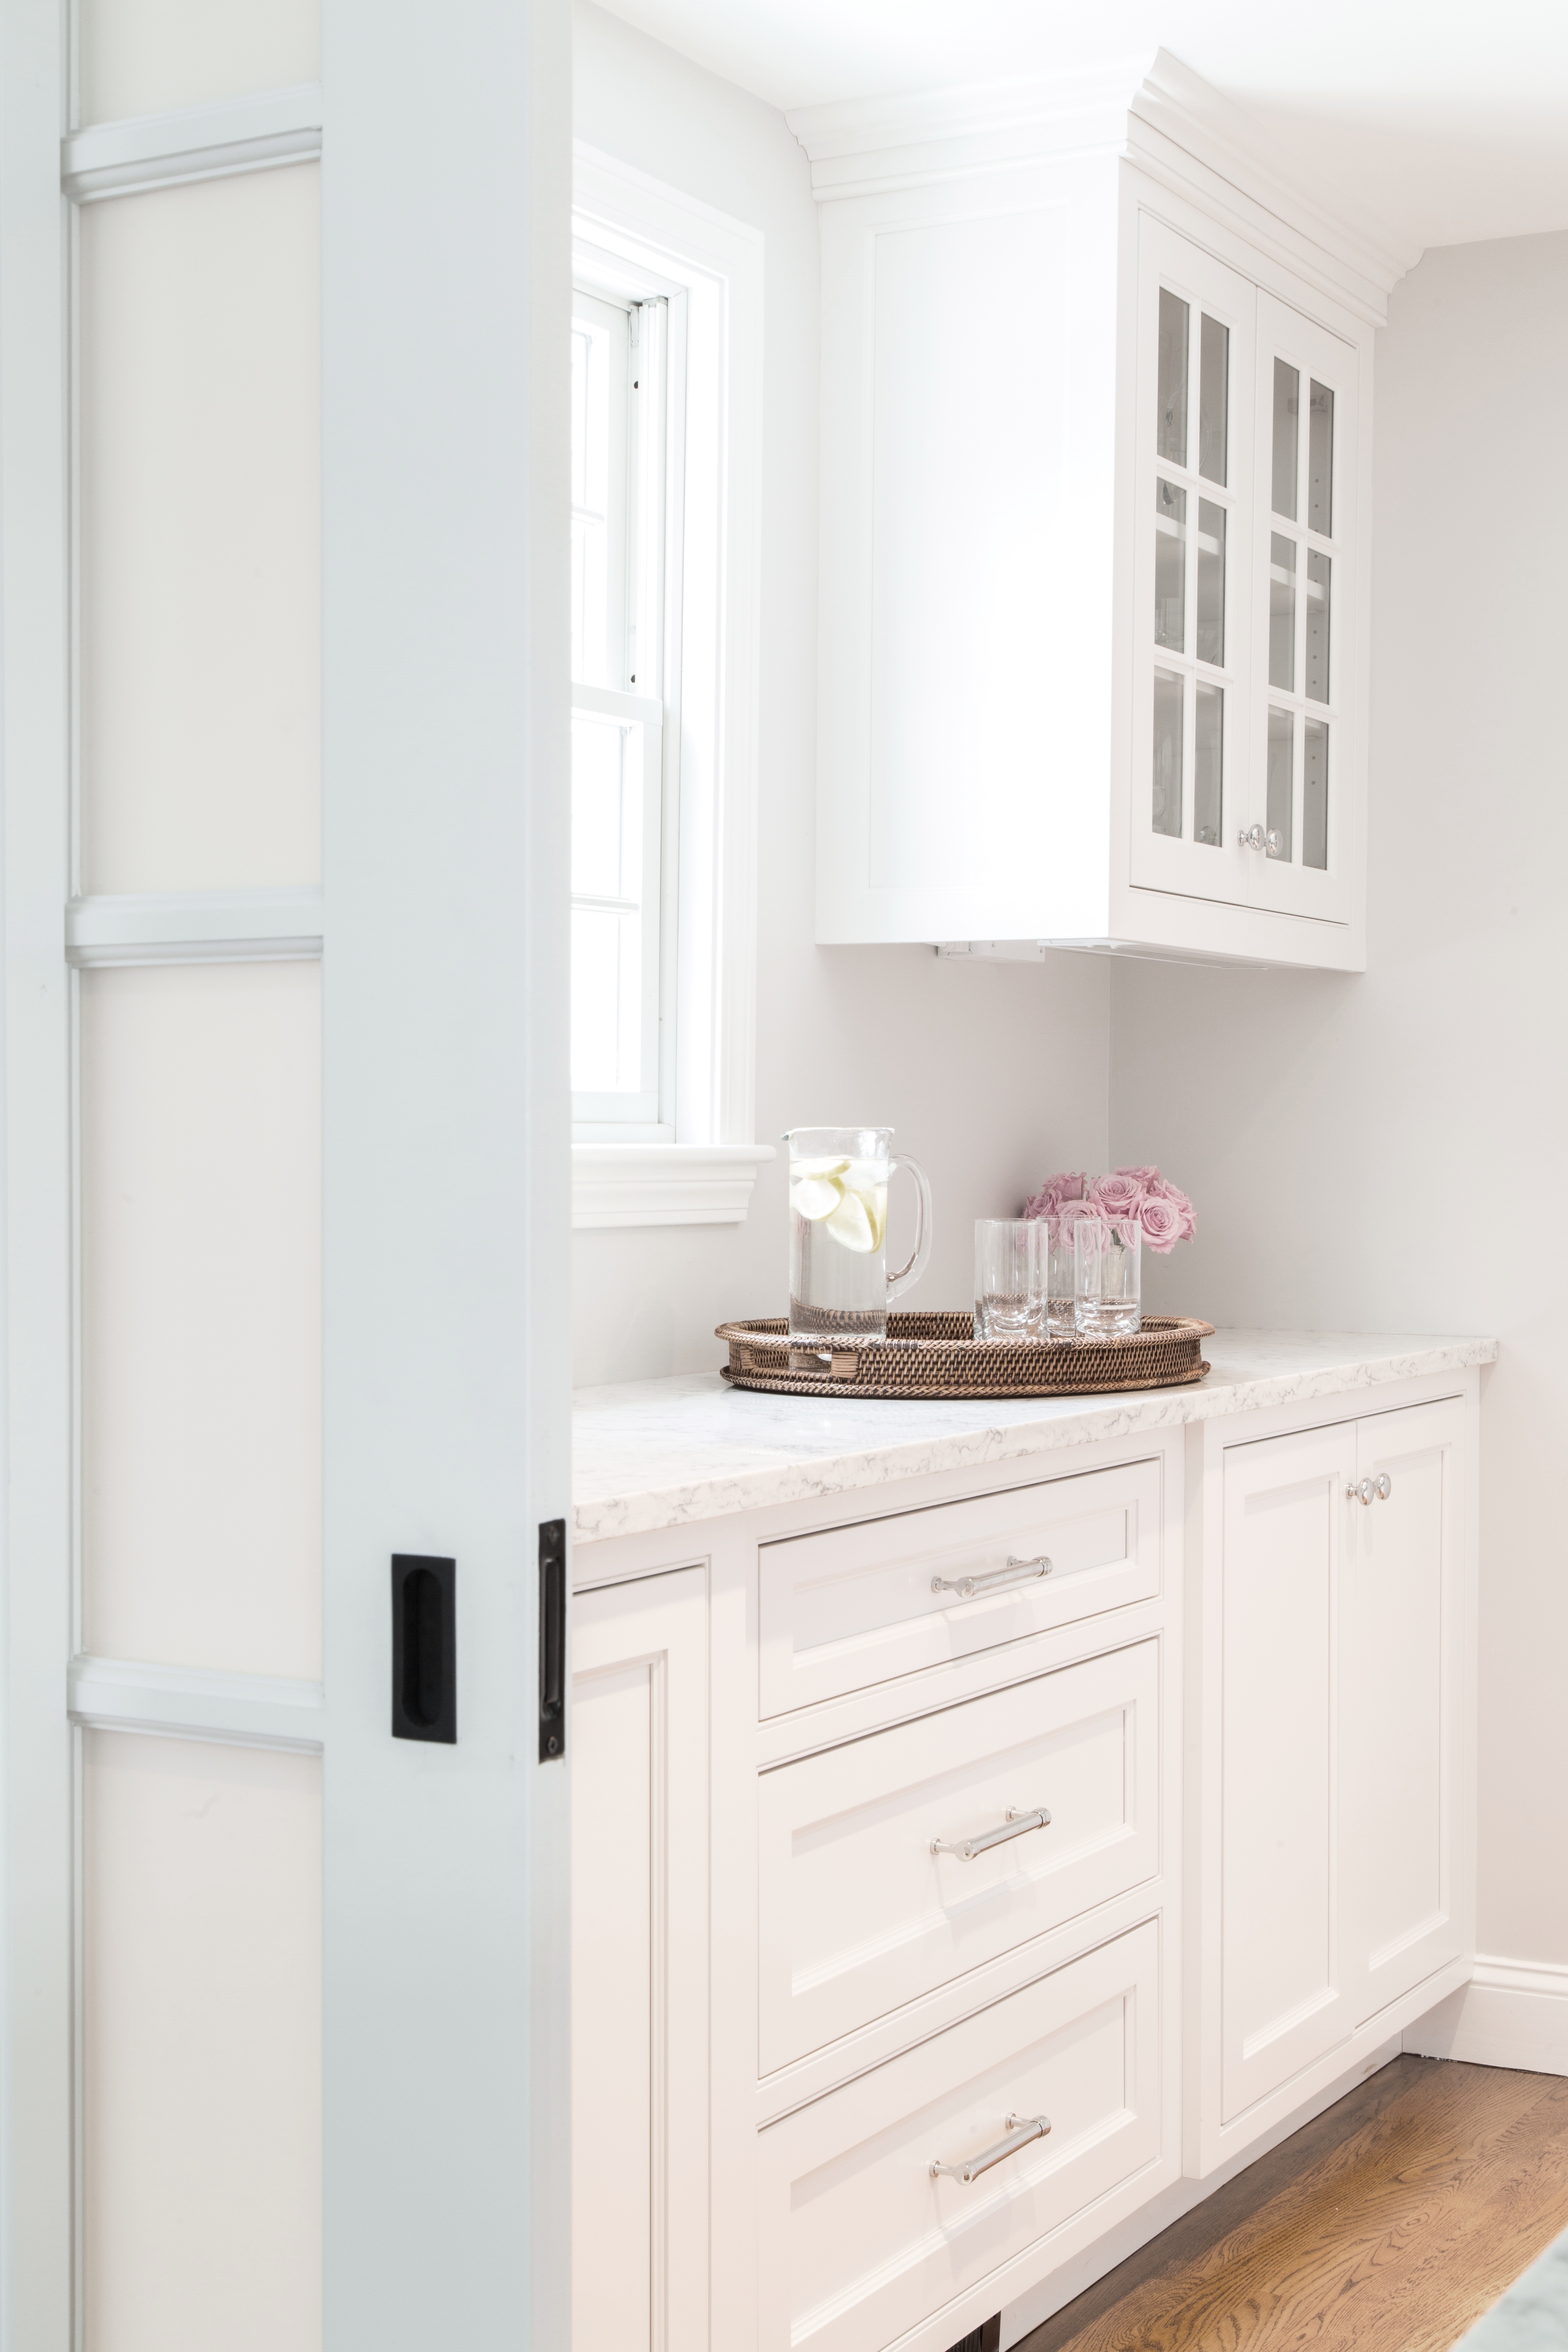
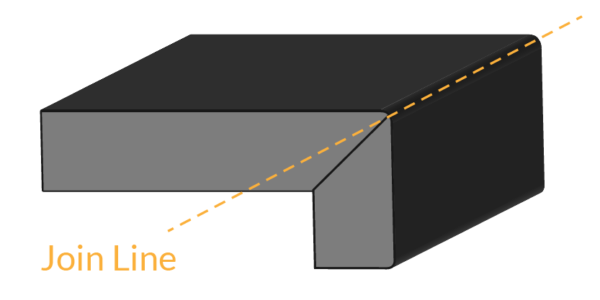 What most don’t know about these thicker counters is that they are actually a mitered edge. It is very uncommon (and costly) to have a stone slab cut at a thicker depth. It would make the stone almost unmanageable for installation and may even be too heavy for most cabinetry that would support it.
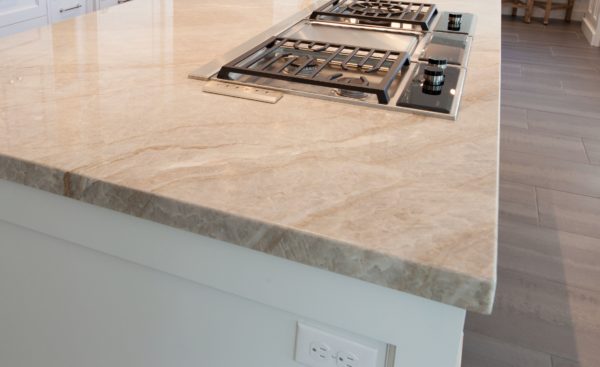


 How it works


 If structural changes are in the plan, an architect will be the next step. If only interior renovations are planned you may just want to enlist the help of an interior designer. Architects and designers have inherently unique styles and strengths so do your homework and find one that tends to have an aesthetic that you are drawn to. Contact them and use all of the information you’ve gathered to discuss the parameters, scope and style & material preferences.


 Summer is breathing it’s last breath, kids are preparing to head back to school and here in New England the weather can turn fast. Prepare now for the impending chill of Fall and winter with some easy home maintenance tasks you can do yourself and some you may want to call in the Pros for.