![]()
Homemade Teriyaki Beef Jerky
 This tasty treat is one that was made by our very own Eric Thorson but comes courtesy of the Wolf’s “Mastering the Convection Steam Oven” Cookbook. You see, Eric & Stacy underwent a renovation of their own recently and in the process learned alot about the Subzero and Wolf appliances that they chose to use in their newly renovated kitchen. The process of selecting their appliances took them to the Clarke Showroom in Milford, MA which if you have never experienced is a showroom unlike any other. What makes it so unique is the no-pressure atmosphere and the focus on education and the client experience. No appliances are actually sold there (hence the lack of pushy sales people) but the showroom features a plethora of fully functioning appliances that you can “test drive” on the spot or do as Eric & Stacy did and join in one of their regularly scheduled cooking demonstrations that help you understand how to use the many functions of your Sub zero & Wolf Appliances all while watching a master chef at work (and getting to eat the resulting gourmet treats)!
The journey to discover the many functions of each appliance and which would be of most use to Eric & Stacy in their day to day cooking endeavors was one that actually helped them to better serve our clients as well. Both Eric and Stacy have shared their new found appliance knowledge with our clients so they too can make educated decisions on which appliances would be the best fit in their new kitchens.
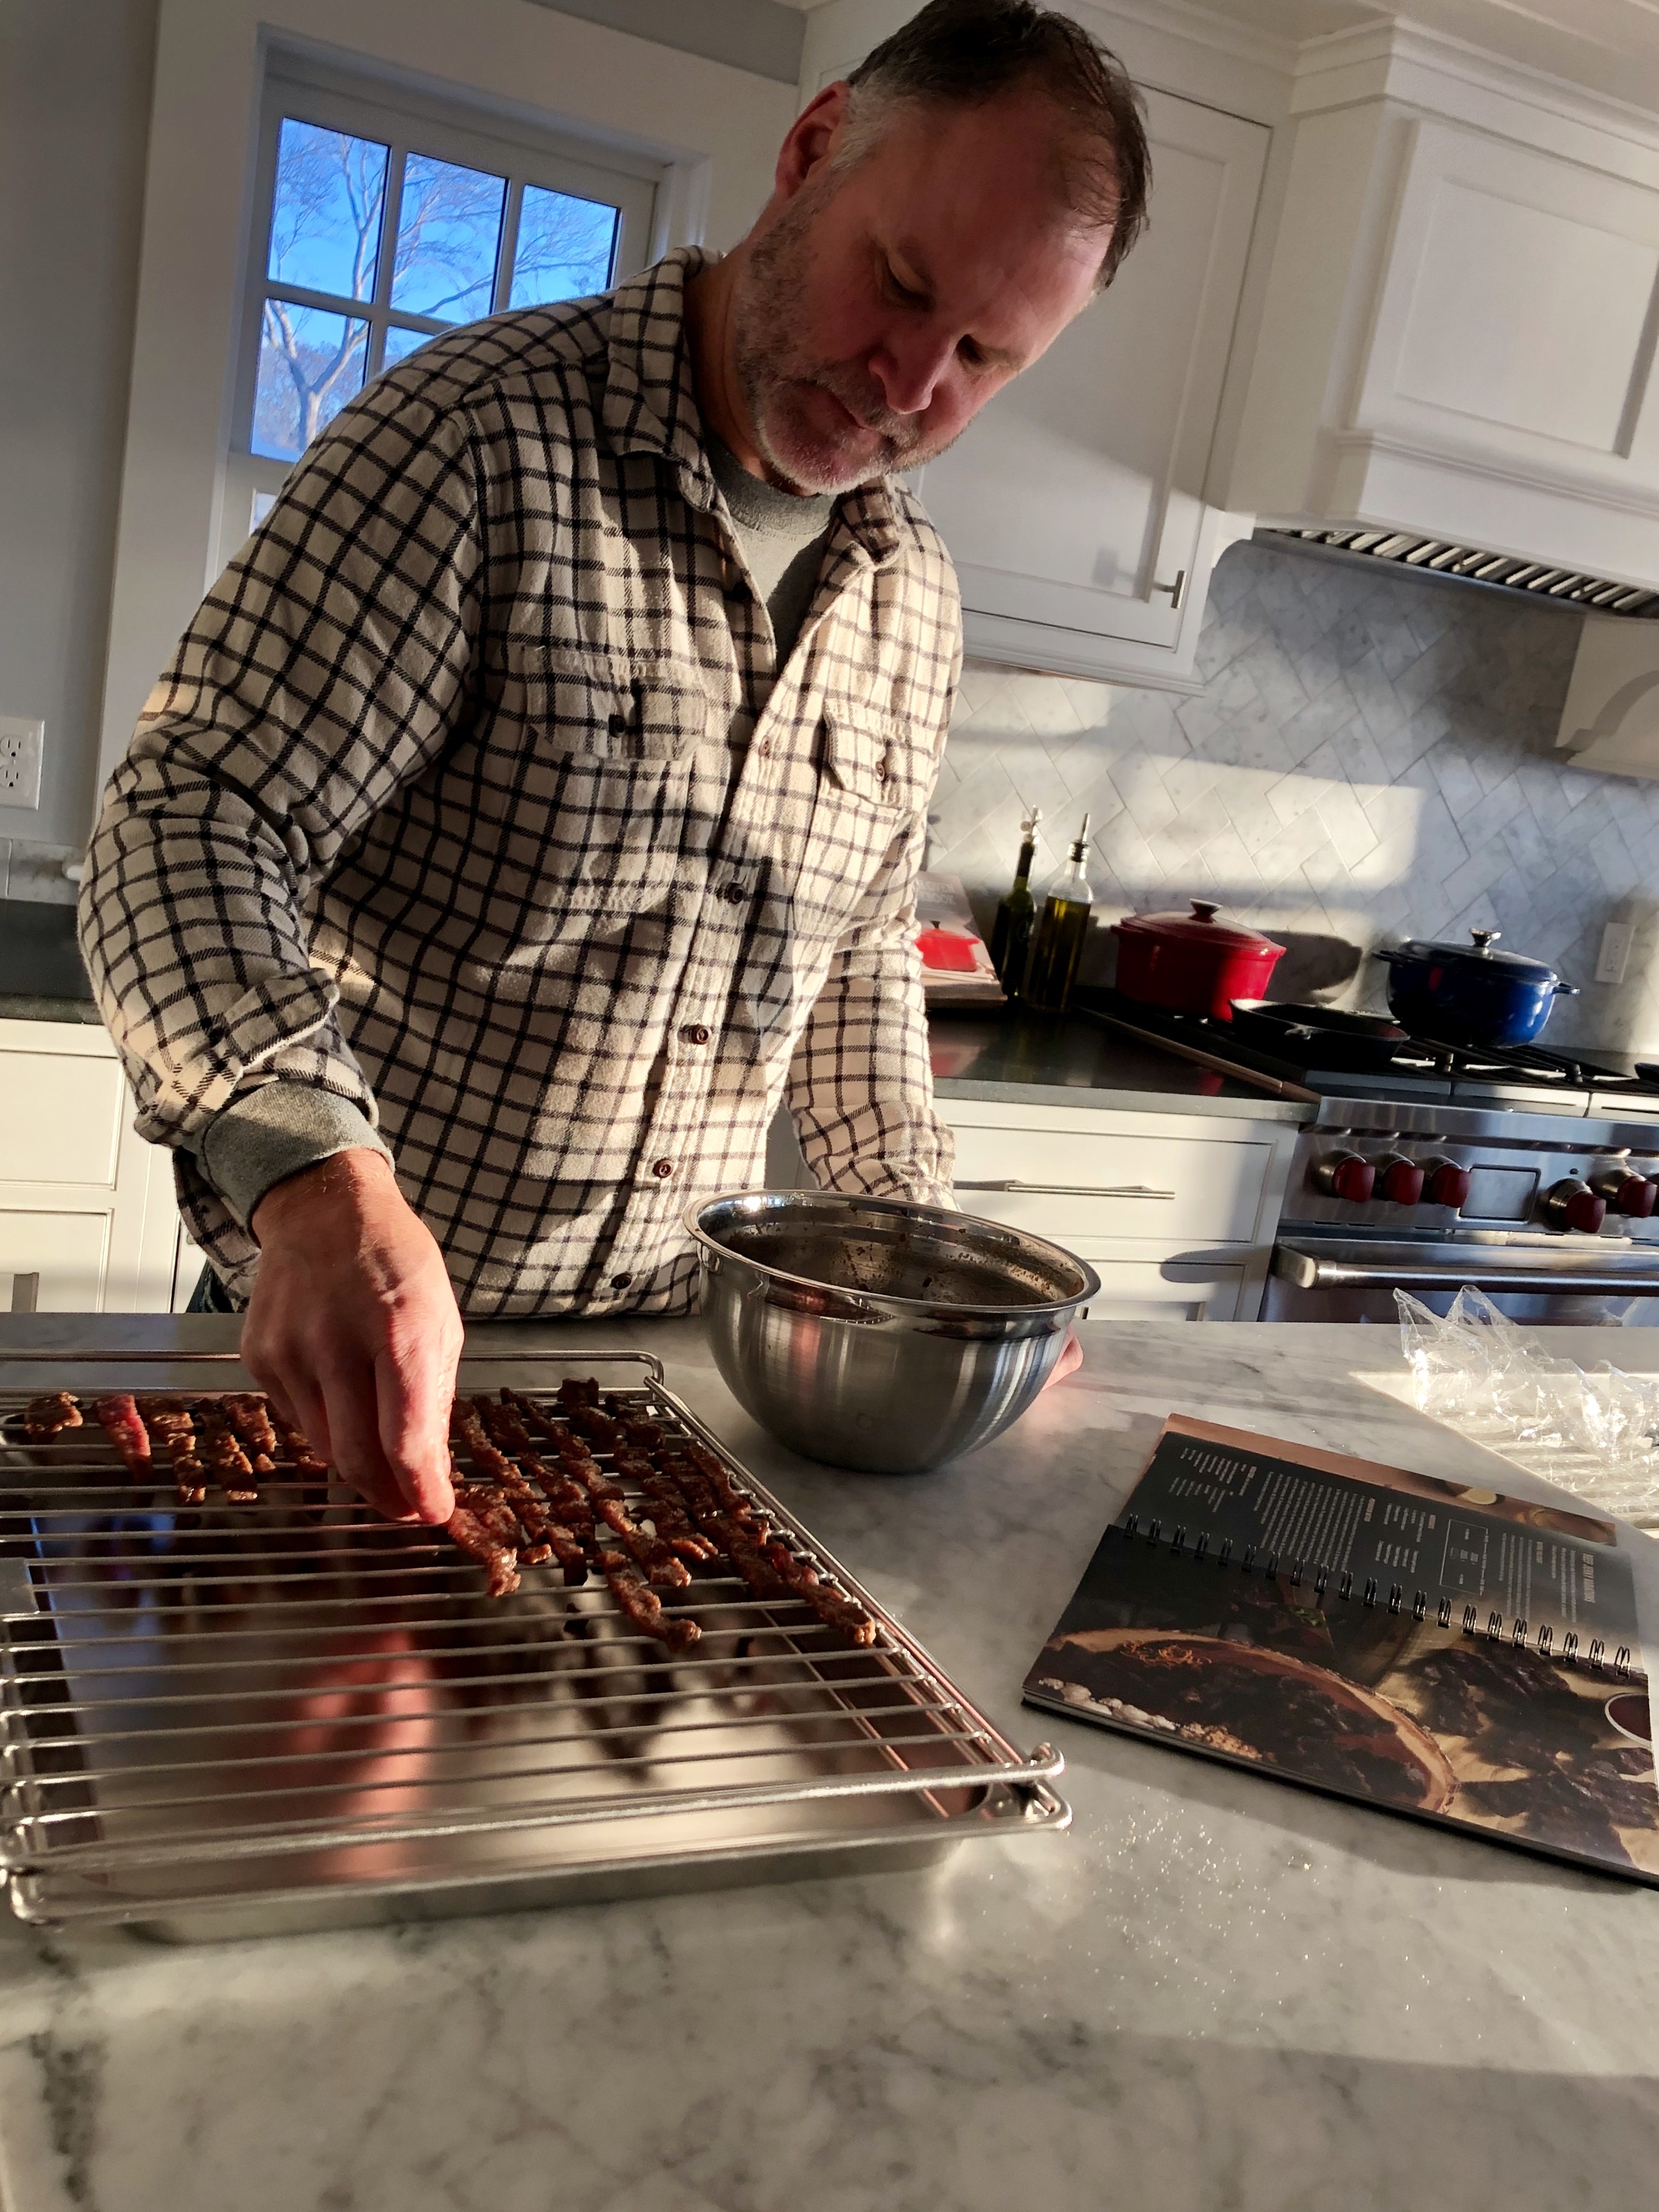
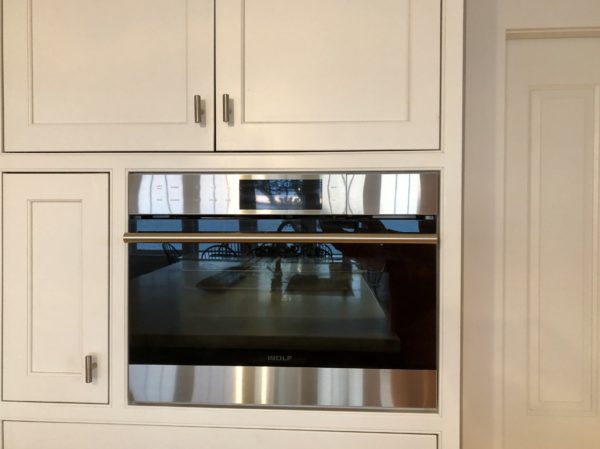
The Wolf Convection Steam oven has created the most buzz by far; for an appliance with a bad reputation for being a “uni-tasker” (to quote Alton Brown) -or an appliance that only does one thing, like steam vegetables, this steam oven proved that wrong on so many counts and has turned out to be Eric & Stacy’s new go-to appliance. They have tested the oven with everything from risotto (that doesn’t need a babysitter) to perfectly “boiled” eggs and even, yes, beef jerky!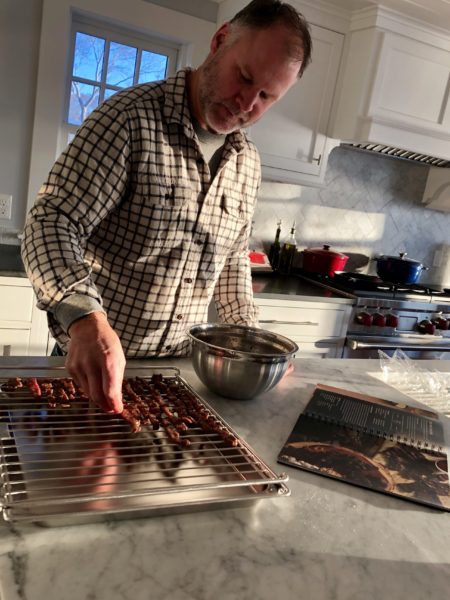
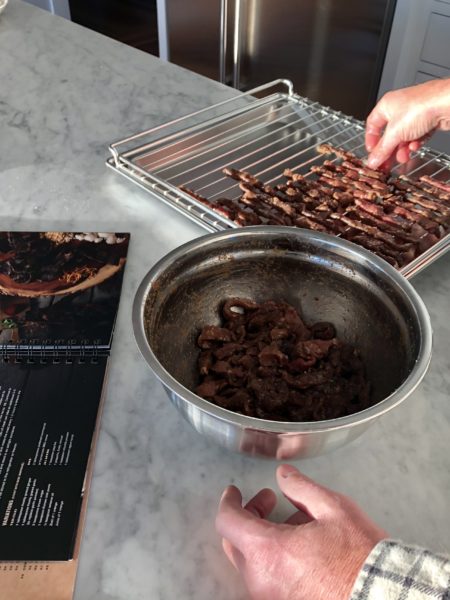
Stacy noticed that their new appliance knowledge has inspired Eric to be more active in the kitchen and try new things that they otherwise may not have thought of. One such occasion was the day she happened upon Eric whipping up some homemade teriyaki beef jerky. The photos here were not staged, Eric, armed with the Wolf Cookbook and the eagerness of a child learning a new skill was happily arranging his pre-marinated steak pieces artfully on the gleamingly new integrated cooking rack. After 4-6 hours in the Wolf Convection Steam Oven on the “convection mode” …Voilla! Eric had himself a perfect pound of tasty home made teriyaki beef jerky that admittedly didn’t last long in their household.
So in honor of this magical real life moment we thought we’d share with you the recipe!
Teriyaki Beef Jerky
Makes 10 Servings
Cooking Time 4-6 Hours
INGREDIENTS 2-21⁄2 pounds beef round or flank, thinly
sliced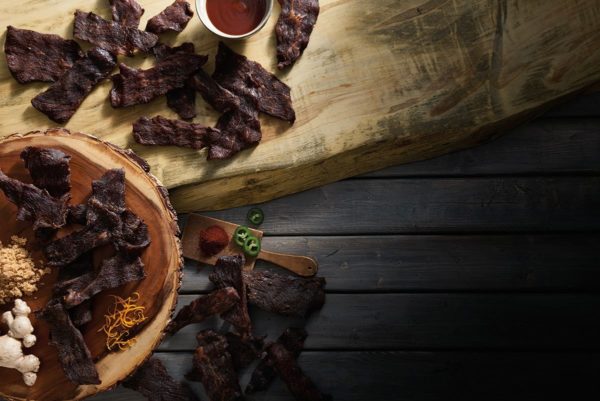
¼ cup soy sauce
¼ cup Worcestershire sauce
2 tablespoons water
1 tablespoon onion powder
2 teaspoons garlic powder
1 teaspoon celery salt
1 teaspoon black pepper
1 teaspoon brown sugar
2 teaspoons kosher salt
TERIYAKI
1 tablespoon freshly grated ginger
1 tablespoon freshly grated garlic
(to replace garlic powder)
2 teaspoons brown sugar
1 teaspoon Korean chili paste
½ teaspoon sesame oil
Zest of 1 orange
Juice of 1 orange
PREPARATION METHOD
1. Have the meat sliced very thin by a butcher at time of purchase, rather than attempting it by hand.
2. In a large bowl, combine all marinade ingredients and mix well to combine.
3. Dip each piece of meat individually into the bowl to ensure an even coating.
4. Allow to sit for at least 3-4 hours or overnight.
5. When ready to cook, drain off excess marinade and lightly pat meat dry with a paper towel.
6. Lay strips out flat on the wire racks. The edges of the meat can touch, but the meat should not overlap or
be folded in any way.
7. Place the racks into the oven on positions 2 and 4. Place the solid pan on rack position 1 to catch any drips.
8. Leave the door slightly ajar and select the Convection Mode set to 150°F. Dehydrate for 1 hour.
9. After an hour, flip over the meat and rotate the racks.
10. Continue to cook until the meat develops a stiff, leathery texture. Thicker cuts of meat can take an additional 3-5
hours or longer to dehydrate and cooking rates vary if using a conventional oven.
11. Continue to flip and rotate the meat every 1-2 hours to ensure the jerky has a uniform texture.
12. Cool and store in an airtight container. The jerky can also be stored in the refrigerator or freezer.
BEFORE YOU START
You will need both of the wire racks that came with your Wolf Convection Steam oven (or any oven safe wire racks if using a conventional oven). It is also helpful to have the solid oven pan to catch drips as you lay out the strips of meat across the racks. Surprisingly, you will also need a colander to drain off the excess marinade. This provides a much cleaner way of handling the strips of meat than removing them one at a time from the zip-top bag.
Recipe courtesy of Wolf’s “Mastering the Convection Steam Oven” guide
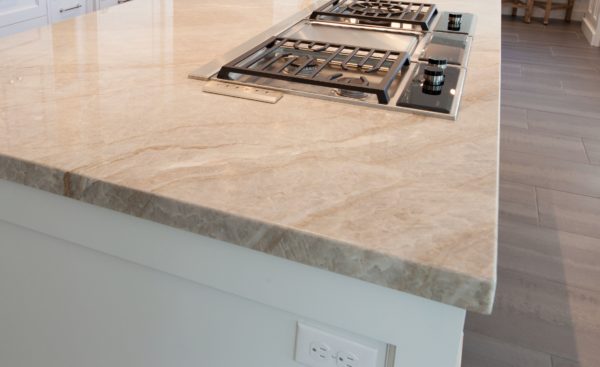
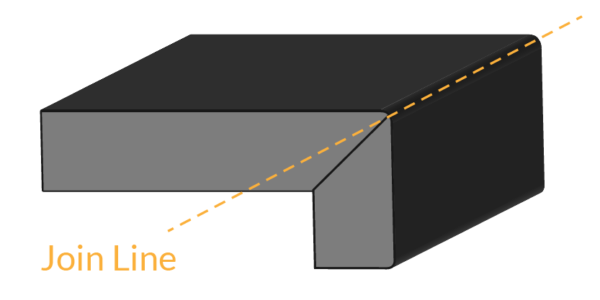 What most don’t know about these thicker counters is that they are actually a mitered edge. It is very uncommon (and costly) to have a stone slab cut at a thicker depth. It would make the stone almost unmanageable for installation and may even be too heavy for most cabinetry that would support it.